Using Workbench
This doc covers the workbench for NER projects. When other project types will be introduced, the workbench would change based on the project type.
Using Workbench
When a record is opened in workbench, the record data along with the tagged text is displayed in the Editor and all the entities defined in the projects are listed in the Entities toolbar.
An entity can be tagged with the text by selecting the text with mouse and choosing the desired entity
A tagged entity can be changed by clicking on the tagged text and choosing the desired entity from the pop-up
A tagged entity can be removed by clicking on the cross icon shown in the tag when it is hovered with a mouse pointer
Entities can be added or modified by accessing the add/edit option in the Entities toolbar
The changes can be saved, marked for training or evaluation by choosing the appropriate action in Footer actions
Tagging related actions like adding a tag, modifying a tag or removing a tag can be undone and redone using the Undo/Redo option in the toolbar
Next or previous records or a particular record can be accessed via the Fetch record options in the toolbar
The data of the record can be modified by choosing the edit text action in the toolbar
Previous classifications of selected-text or tagged entity or a suggested entity can be seen in Previous classification widget by hovering on the entity. The tagged entities for the selected text in the record can be highlighted by toggling the highlight icon
A Dictionary can be added to see the meaning of the text select or a tag hovered upon.
This widget can be re-purposed to a json-endpoint where it can provide additional info for the selected text or word.
NER Workbench Layout
Workbench for NER projects has the layout as shown in the picture below.
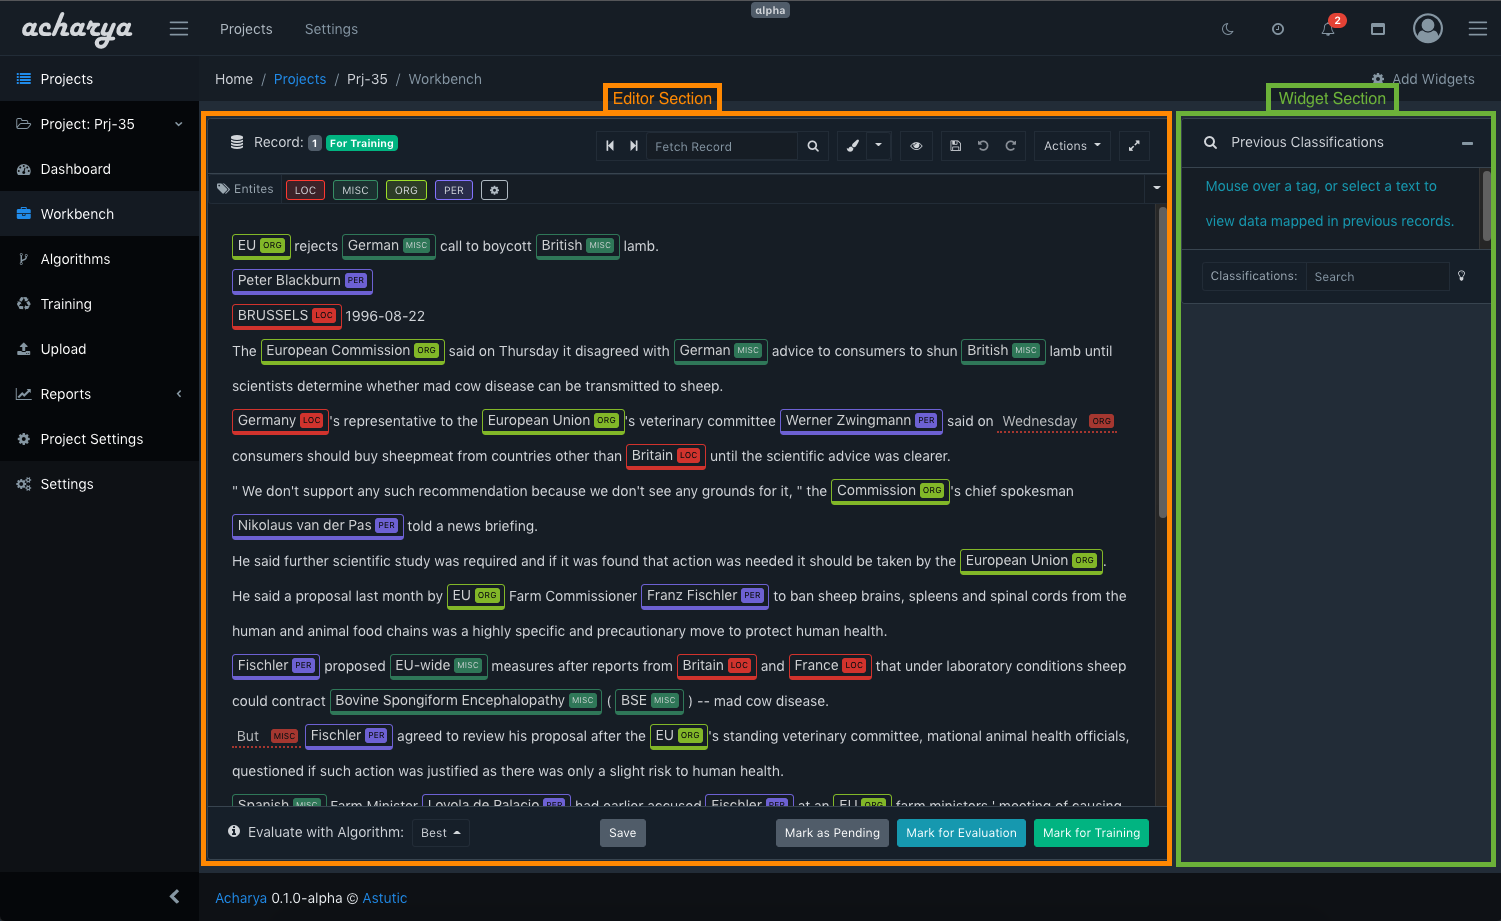
As shown the workbench layout can be broadly divided into 2 sections namely editor and widget sections.
Editor Section
The editor section has the following parts
Toolbar

Current Record Info
This toolbar item shows the current record being editor and the purpose (See Marking Records) of the record.
Fetch record
Provides controls to go forward and back or fetch a particular record.
Changing entity style


Allows to set the style of entity tags.
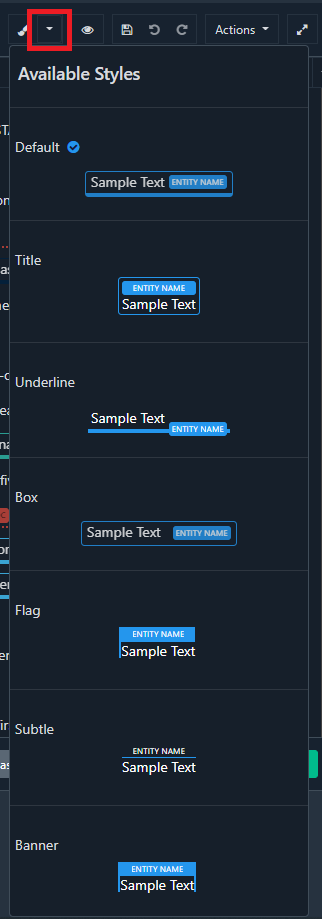
There are 7 pre-configured styles for displaying entities. The styles can be toggled by clicking the brush icon at the top of workbench
If you want to be more specific you can click on the drop-down button next to the brush.
It will bring a drop-down consisting of various styles. Simply hover over them to see a quick preview and Click on them to use the stye.
Supported styles are: Default, Title, Underline, Box, Flag, Subtle and Banner

Toggle Suggestions
Missed classification suggestions can be enabled or disabled by toggling the button
Save, Undo and Redo
The changes can be saved, UNDOed and REDOed using these set of buttons
Editing Records
The record data can be modified by selecting the Edit Text button under the Actions Option in the toolbar.
Full-screen mode
Full-screen mode for workbench can be toggled by clicking this button.
Manage Entities
Entities are shown in the Entities toolbar
This toolbar lists all of the entities defined in the project with an option to add/edit entities.
Clicking on the entities will tag the selected text in editor with the entity. And clicking on the cog icon or Add/Edit Entities would enable adding/editing of entities.
Entities can also be filtered just select the text and then search the input field
Editor
The editor shows the record data, and the tagged entities. The data can be tagged with an entity by selecting the desired characters and clicking on the appropriate entity.
Footer actions
Some action buttons are shown in the footer of the editor

- The record can be evaluated with a trained algorithm, this will provide auto-labelling suggestions based on the selected algorithm
- The record changes can be saved by clicking the
Savebutton - Records can be
markedfor training, evaluation or can be assigned the pending status.
Marking Records
A record can be Marked as:
- For Training - this record will be used in training
- For Evaluation - this record will be used only for evaluation and not training
- Pending - this record will not be used in evaluation and training
Widgets
Widgets can be added to the workbench of a project to help annotators in the annotation tasks.
Previous Classifications
Previous classification is a default fixed widget which helps annotators see the previous classifications of the selected text in the data-set of the project.
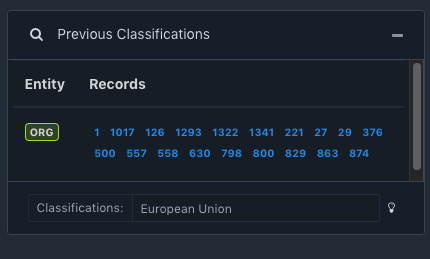
Apart from the help in suggesting previously classified records, it also helps in identifying miss-classifications or record data issues.
User can write text in the Classifications text box and this widget will search for any previous classifications for that text.
The case-sensitivity of the searches can be set by setting the case-sensitivity on the project
Toggling the highlight icon would highlight the tags of the selected text de-highlighting other tags to quickly identify the tags in the text.
Adding widgets
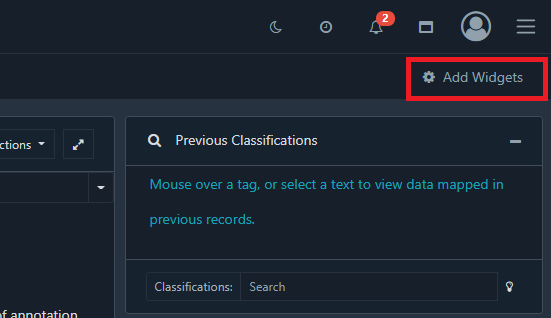
Widgets can be added onto a project with the help of Add Widgets button which is present on the breadcrumb menu bar or by another Add Widgets button which is present on the right side panel. on clicking Add Widgets a modal with a list of widgets will appear. Simply click on the Add Widget button on the selected widget to add it into the project


Removing widgets
Widgets can be removed by clicking the cross Icon on the widget
Minimizing widgets
Widgets can be minimized with the minimize button present on top of the widget.
Configuring widgets
Widgets can be configured with the gear icon that is present on top of the widget


Available Widgets
Shows the available widgets for Workbench, currently a Dictionary widget is available. More widgets would be added soon.
Any number of widgets can be configured and used.
Dictionary widget
Dictionary widgets allow you to find meaning of the selected word, just double click or hover over the word to select it. Dictionary widget support two configurations HTML and JSON
- HTML mode
- JSON mode
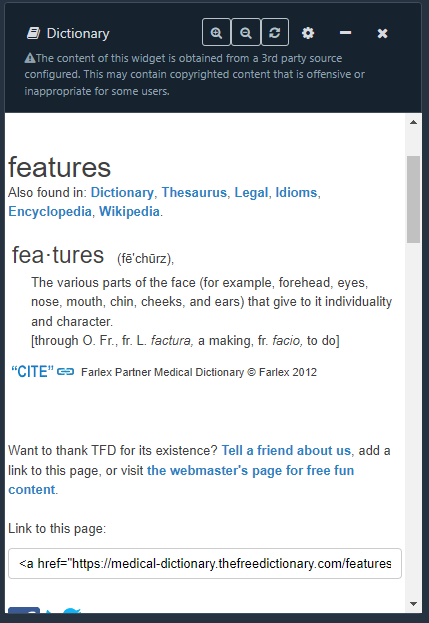

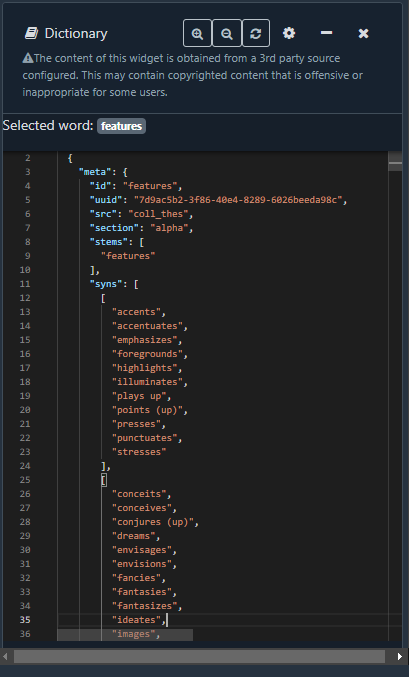

The above outputs have been provided by
medical-dictionary.thefreedictionary.com and www.dictionaryapi.com respectivelyConfiguring Dictionary
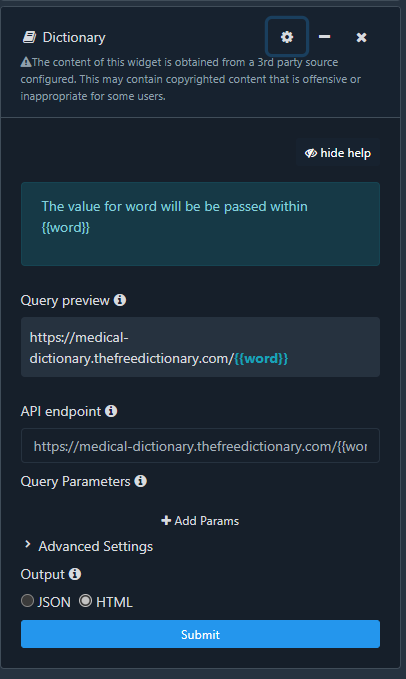

Dictionary widget allows you to configure your own dictionary provider. It can be configured by the following parameters:
API endpoint
API endpoint determines the url where the data would be requested from
Query parameters
Query parameters takes in a key value pair, these key value pair will be appended onto the API endpoint.
Query variable can be passed using {{word}} syntax
The value for word will be be passed within {{word}}
example: If the user has selected the word "Zebra" and the API endpoint is https://astutic.com/{{word}} then url queried would be
https://astutic.com/Zebra
Advanced Settings
Headers
Headers can be added by toggling Advanced settings. It takes in a key value pair that would be added to every request
Output Modes
The Dictionary widget supports two modes
HTML mode
JSON mode
If the output is HTML, HTML mode is suggested and if it is JSON then JSON mode is suggested
A Query preview is provided within the widget, it is recommended to check the query using it before querying.
Usage
After the widget is configured just hover or select a word from the workbench. The widget will then show the response of the endpoint onto the UI